

Oh yes, it is true that when it comes to light gathering power and resolving capabilities, the wider (larger) the telescope the better. It goes without saying that visually, what you are capable of seeing through a large enough telescope just cannot be matched with smaller aperture. I speak for all of us when we say, well of course we’d all love to have the biggest telescope possible!
As amazing as their capabilities are, we must go over the pros and cons of larger telescope setups, and why beginners shouldn’t just jump right into getting the biggest, most badass telescope/ astro imaging setups just because they financially can.
It is safe to say, you get what you pay for. Some may spend five to six figures on telescope equipment over their lifetime, and money doesn’t matter because it’s their love and passion. Others can only afford the setups that cost less than four figures, and they need to make a choice on how much technological sophistication they also want for their price range.
But just because you have a small (3-5 inches in diameter) or medium (5-10 inches) telescope doesn’t mean you are missing out on quality. For example, Questar telescopes are pretty small in comparison, but their optical quality is so good and one of a kind, that these 3.5 inch tiny maksutovs can still sell for a few thousand dollars – used, not new, USED!
At the end of the day, when it comes to amateur hobbyists and even professionals who use telescopes, the path they end up taking is what suits their own needs, not wants.
Where Bigger Doesn’t Always Mean Better
How sharp and clear does the image look?
It’s just a simple fact: the larger your telescope and the more you magnify, the more you deal with the apparent rippling and blurring due to atmosphere refraction. Smaller telescopes, especially high quality refractors, won’t deal with it as much.
Casual viewers will notice sharpness before they digest the details they can actually see – thus the lower magnification views always look sharper than when I make things look bigger. On nights when I had more than one telescope showing the same object, the larger telescope was set to a higher magnification and vice versa. After people had a chance to see both views, they usually remark, “it looks clearer through the smaller telescope,” or “the color contrast looks better in the smaller telescope.”
On any average night, the local seeing conditions will prevent you from magnifying further than 200-300x at the most. Therefore your double digit aperture capabilities of magnifying higher than 500x are practically useless because the view appears too distorted. Instead, you’ll get a lot of people complaining “it looks too blurry! Are you sure it’s focused?!” This is a reason why a lot of telescope users prefer sharpness over magnification, and don’t like to mess with zooming in and out too much.
Bright Objects Can Overwhelm Your Eyes!
Telescopes collect more light than your human eye receives and focuses into a focal point, which your eye receives in the eyepiece. In the case of viewing bright objects, that can also be somewhat of a curse if you use too large of a telescope, especially when it comes to the Moon!
When the Moon is very prominent and close to, if not at full phase, the increased amplified light going into a larger telescope feels very overwhelming! While you won’t go blind, you’ll still feel the light entering your pupils, and unless you use a special Lunar filter, you’ll hurt your eyes!
When it comes to the bright planets like Venus, Mars, Jupiter, and Saturn, they can actually appear to be glaring and a little overexposed through a larger telescope. For example, when I look at Saturn through my 8″ scope, it seems just the right amount of light is entering, as I can see Saturn as a distinct yellow ball with different shades of yellow, surrounded by white rings. But through an 11″ SCT, while I can still see the details and shadows just fine, the yellow color appears white washed due to the increased amount of light gathering power overexposing the view.
I get asked all the time why observatories in or near cities don’t just build larger telescopes to gather that light they lost? It’s because they’d still gather more light from the light pollution as well. Yes, you’ll see a little more than you would from a smaller scope, but most deep sky objects are still invisible in light polluted skies through larger scopes, and they are shells of their true selves if you can still glimpse them.
Transporting And Storage? Not So Fun…

The larger your setup, the more storage and trunk space you need!

Thankfully I am able to keep all my equipment tucked away in a corner near the back door for backyard observing, but the more I keep adding, the more space I am taking up!
I love my Atlas II mount, but compared to my SkyView, it’s much heavier and bulkier, hence tougher to transport. The 8″ Newtonian that I still use is also pretty bulky. Telescopes with diameters in the double digits are practically a two man job to lift and set up without risking muscle pulls and back pain. Plus don’t forget the other parts to the telescope that you’ll need such as power sources, counterweights, screwdrivers, and of course whatever components you need for visual and/or imaging.
The point is, larger telescopes need to be transported in pieces, assembled, broken down, and then re-transported in pieces on your return trip.
While it’s something that I’m used to doing, always transporting and setting up my large EQ mount for deep sky imaging is a task that can take a while, and there have been nights where I lost valuable night hours due to my alignment procedures taking too long, or me needing to fix a snag caused by factors that would take an essay to list.
For this reason, a lot of observers keep their larger setups at home, often ready to go in or near their backyard. When there’s only one thing we want to see, then we don’t want to waste time setting up, performing alignment procedures, and then breaking down for just one object!
One can now understand the appeal of building a private observatory for such that task, especially if your giant double digit scope and equatorial mount are always going to stay put! But even the smallest private observatories are not cheap to build!
It’s Much Tougher with Deep Sky Imaging
Oh, you want a double digit aperture scope for imaging? You better have the mount that can handle it!


Deep Sky long exposure astrophotography with larger telescopes is way more advanced than you think and not something to jump into because “well if this Anthony guy can do it, I can do it!”
It’s easier to start small and do deep sky photography with a smaller wide field scope. Even a telephoto camera lens with an EQ tracking mount can provide a good introduction to deep sky long exposures. For a lot of people, ease of setup, portability, and convenience means more than size!
All equatorial mounts have a max load capacity – if your optical tube assembly (OTA) is too heavy then the mount will not balance or move properly with Earth’s rotation. The scope is also more prone to vibration when moving, and gear backlash from fine adjustments due to too much stress being added.
So even if that 14” Celestron Edge HD SCT looks like the scope you want, with the OTA alone weighing almost 50 lbs, you need a huge mount capable of holding it – and they’re not cheap!
Also, when it comes to imaging, the usual rule of thumb for your total OTA weight is close to half the mount’s max load to ensure the smoothest possible RA tracking while the scope moves with the earth’s rotation, and to reduce the DEC backlash as much as possible when guiding. Believe me, it’s not fun dealing with impaired guiding and ruined exposures.
Larger imaging scopes, especially catadioptric and refractors also typically have longer focal lengths as well – meaning your default image is more magnified. While it’s great for objects that appear smaller through telescopes, let’s say you want a picture of the Horsehead Nebula, which covers a larger portion of the sky. Using a wider focal length, you can not only capture the Horsehead itself, but also the Flame Nebula next to it and Alnitak – the left star of Orion’s Belt – all in a single frame. But with a longer default focal length, you’ll need to carefully compose a stitched mosaic to get all the features you want to showcase in a single desired frame.
Longer focal lengths also usually mean a higher focal ratio number (f stop), meaning light travels “slower” into your scope, hence you need a longer exposure time to capture the desired feature in the frame.
The more you deal with these factors, the more you have to worry about these tiny errors and vibrations showing up in the exposures if your polar alignment and guiding isn’t good enough.
If you’re a beginner, and hope to do imaging one day, you have to ask yourself, “do I really want to jump into all of that?” If you’re impatient and get frustrated easily, then let me do the imaging for you and you can just enjoy the finished shots and share them!
Realistically, How Much Difference Are We Talking?
How Much Resolution?
You can determine your own scope’s max resolution by dividing 115 by the aperture in mm. Most of the time, an 8″ (203 mm) telescope, with the resolution of about half an arc second (0.56″), will give you the max resolution available due to Earth’s atmosphere limiting it to that same amount. While a 16″ (406 mm) scope can resolve about 1/4 an arc second (0.28″), you need super steady air, what we call excellent seeing conditions, to be able to see that difference in clarity!
What about the difference in light gathering power?
Yes, a telescope that’s twice the diameter collects four times more light. That’s four times more light than what is already visible in smaller telescopes. What about bringing new objects in that you couldn’t see at all before?
Every telescope still has a magnitude limit – or the dimmest light you can detect. Remember that in astronomy, the higher the number in magnitude, the dimmer the object. When it comes to the dimmest magnitude you can see based on aperture, an approximate formula is determined by calculating 7.5 + 5log(aperture in cm), hence my 8″ (20 cm) scope’s limiting magnitude {7.5 + 5(log20)} is about 14. 4″ (10 cm) scopes can’t detect anything dimmer than mag. 12.5, 12″ (30 cm) past mag. 14.9, and 16″ (40 cm) past mag. 15.5.
And those numeric book values are based on your telescope’s optical conditions being the best, the sky conditions above being pristine, super steady, and with no light pollution, plus the conditions of the observer’s eyes.
Wait, you can just do long exposure images and see things that way, right? Yes and no…
If the object’s apparent magnitude value is lower than your scope’s limiting magnitude, then yes, a few seconds of exposure can make it visible if it’s a point of light like from an asteroid. But if any object’s apparent magnitude is higher than your scope’s limiting magnitude, then it won’t matter how much light you can accumulate, it won’t show up at all in the exposures!
Unless you’re actually searching for or studying/tracking objects dimmer than magnitude 14-15, you don’t necessarily need a huge telescope to show off – There’s enough to see that a small to medium telescope isn’t capable of showing!
Okay… So When Is It Worth Having a Large Telescope?
On those rare nights if the air is super steady, then those high magnified views where you’re going above 500x are absolutely worth it! Seeing Jupiter’s Galilean Moons as actual discs instead of star like points, seeing Mars up close and personal when there’s ice caps and surface features are visible, seeing Saturn look just like the pictures, etc, are treats to see time and time again. Seeing Uranus and Neptune, which require both good seeing and a large enough aperture to see them as distinct blueish discs is also a plus!
You CAN resolve tight double stars much better. Assuming the air is steady enough, larger telescopes are masters at resolving tight doubles into visible pairs. This especially applies to double stars that have between 1-10 arc seconds at the most. For example, resolving Epsilon Lyrae, into its “Double Double” namesake is much more pleasant on the eyes through a larger scope.
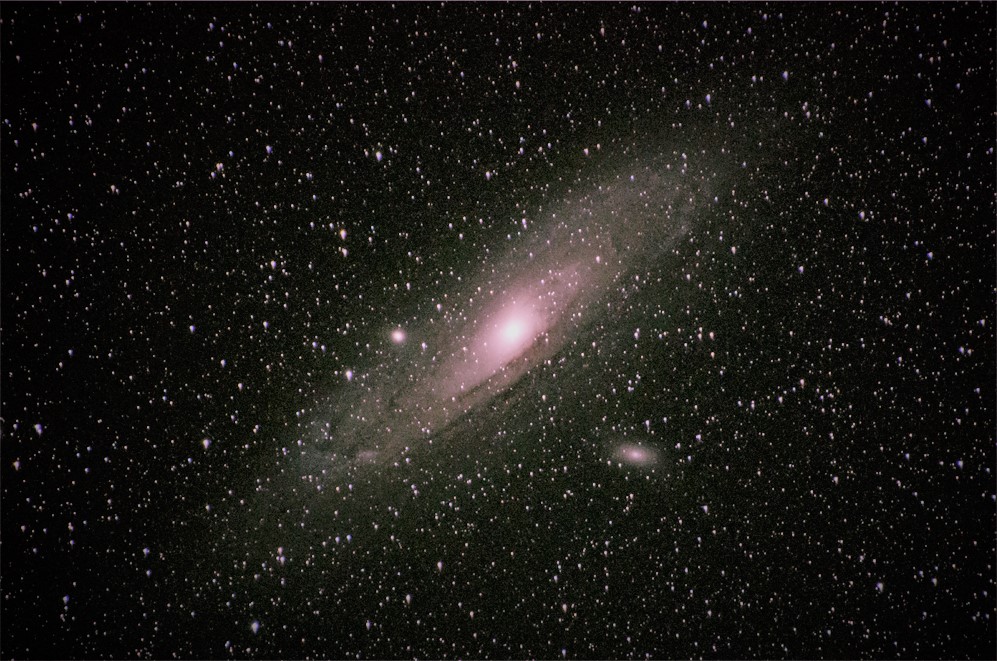
You DO see more Deep Sky without question. There are plenty of famous celestial sights that are practically invisible with a small scope from a light polluted sky, but a large enough aperture can still help you glimpse them better. This is especially true when it comes to open clusters. However, if you plan on looking at nebulae, globular clusters, or galaxies, then you need to get to a darker sky, where their light gathering power “shines” – pun intended – and their views of the deep sky are unmatched! There’s a good reason why there’s a growing crowd of large Dobsonian enthusiasts – you get to use that light gathering power without having to worry about being too technical!
You definitely see more depth to the Deep Sky! Deep Sky objects are surely brighter through a larger aperture scope than a small one. Even if you don’t necessarily see an increase in brightness, you definitely see more depth to what you’re seeing. While most galaxies will simply look like brighter gray smudges, some galaxies like M51 and M101 will remind observers why they were once labeled “spiral nebulae” as their spiral arm structure is better glimpsed through double digit apertures. Planetary nebulae like M57 – the Ring Nebula, and large Globular clusters like M13 actually resemble their pictures more, and can be viewed at high enough magnification without losing the required light to resolve their details.
Is the Telescope Being Used? What sense do you have if you purchased a large aperture telescope but you don’t do anything with it?! It’s not the size that matters, it’s how you use it!
Have you seen as much as you can with your small scope and are curious what a larger setup feels like? Then you have a good reason to start looking into a larger telescope setup that fits your needs when it comes to portability, ease of setup, and convenience.
For a lot of people, the pros of portability, ease of setup, and convenience with smaller setups will outweigh the cons of dealing with larger and heavier setups. For others, they’ll find the cons worth it just for those rare nights of steady air, or those visual deep sky views out in the countryside that cannot be matched!
And hopefully when it comes to imaging, this post emphasizes that going for the biggest visual views and going for the biggest imaging setups are entirely different ballgames from each other – and how much tougher it is to get (properly working) large imaging setups than large visual setups!
Truth be told, there is no “wrong way” to enjoy the night sky, and what path you take should reflect on who you are and what you like to do. Did I know that I’d get into astro imaging eleven years after I renewed my interest in astronomy? No, it just happened that way – but it’s something I chose because it suited me. For others, they’re satisfied enough just seeing things with their own eyes and that path suits them.
It’s fun to discover what details you can still visually see based on the aperture and sky you’re observing under – when all else fails and my images are not working out, I can always take the camera off, put the eyepieces back on, and remind myself why I enjoy stargazing in the first place!
Support your Neighborhood Astronomers
Everything is free, but donating helps keep this astronomy outreach blog alive, and it goes towards outreach events.
1.00 $
