

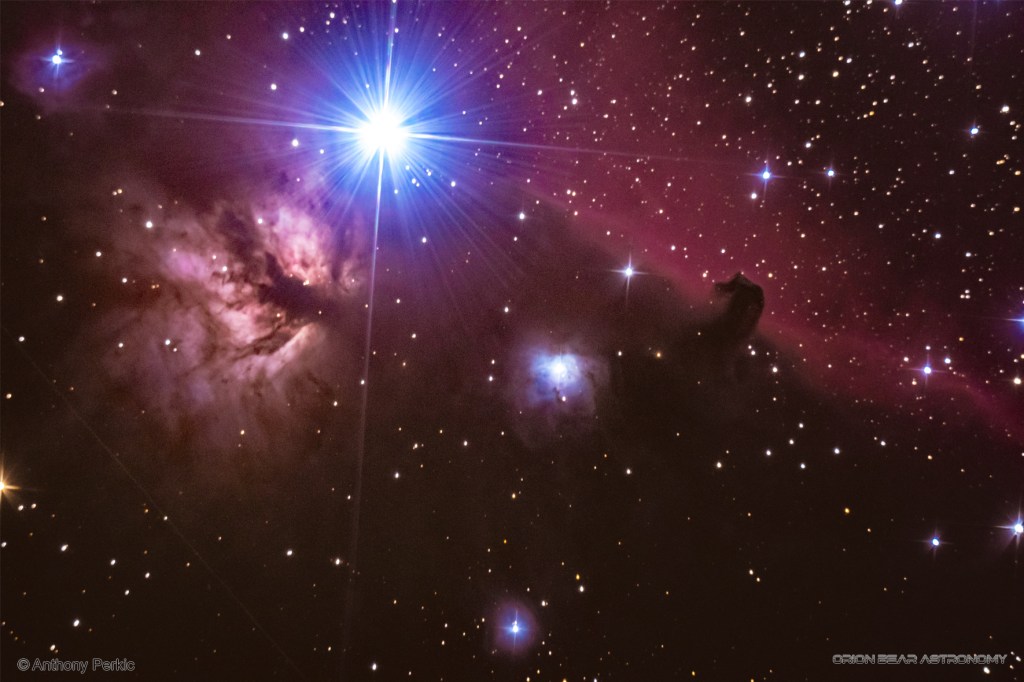
I’m sure there are those who are interested in the processes I do, at least currently, to achieve the photos that I’ve recently taken such as my HorseHead Nebula shot. I’m more than happy to tell you, not because I’m “giving up secrets” but more to emphasize the dedication it takes, and the difference between good and great astrophotos. This will also serve to help dispel any myths or misunderstandings one might have when it comes to the processes involved.
This is not a detailed tutorial, but more of a general rundown of what I do before, during, and after shooting prime focus deep sky photos.
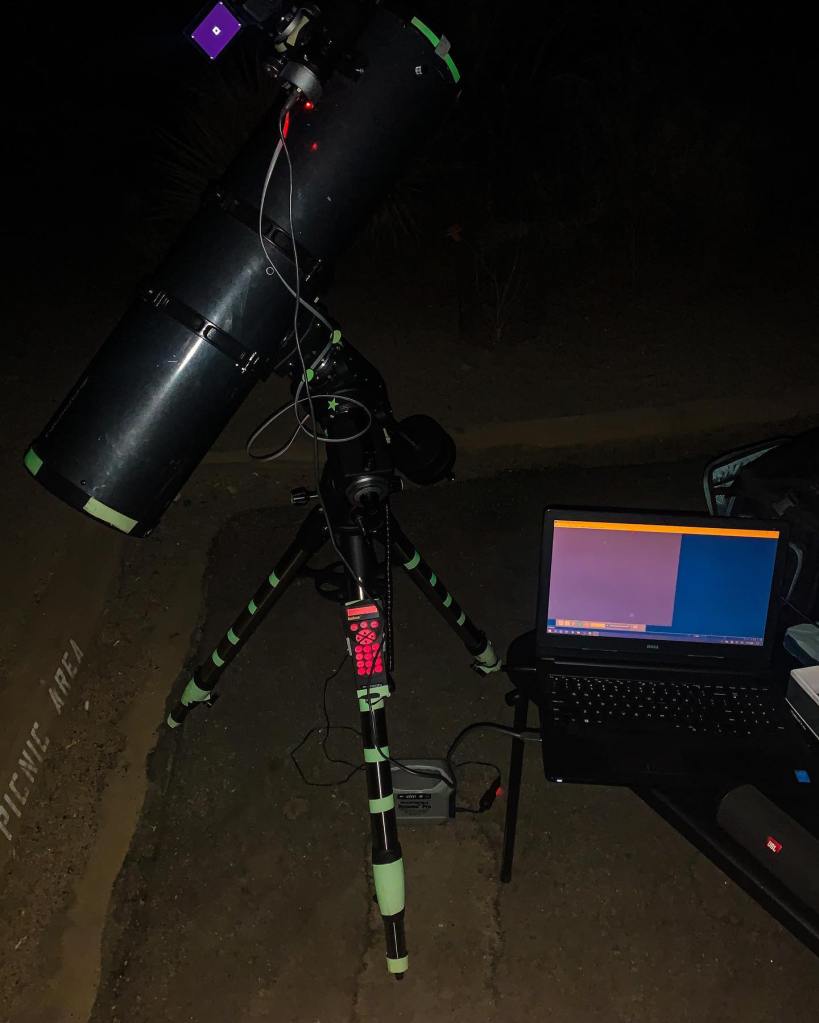

Setting Up The “Nomadic Observatory”
First things first, if you want a list of the current equipment I use, go to the FAQs page where it’ll give a detailed list. All that you really need to know here is that I have all the main components required to take the image, and process it later:
- Equatorial Mount – one that is capable of automatically moving and tracking with Earth’s rotation, AND able to hold the weight of the Optical Tube Assembly (OTA) which includes the:
- Telescope Tube
- Imaging Camera
- Guide Scope and Guide Camera (Inserted after alignment)
- Portable Power Source
- Laptop to run Guider Software (not needed in session if not guiding), and to process later in Adobe Photoshop…
The power source is carefully placed in a spot where I’m least likely to step on the cables or battery itself during the night. The laptop, which will run the PHD2 guiding software, I usually have on a small “TV dinner table”, ready to move it around so the cables stay connected when the telescope switches positions. I also bring a camping chair, portable table, and step ladder – and their uses should be obvious.
Polar Aligning and Balancing
These can be done in either order, but after getting everything out of the car and ready to set up, I:
- Balance the OTA with the mount and counterweights – besides the tube, camera, and guide scope, the OTA includes the docking bar and tube rings which hold the telescope tube.
- If done right, the OTA will stay put no matter where you leave it while the axis locking clamps are unlocked. If you’re just a little bit off, you’ll see whether you’re top or bottom heavy.
- Calibrate the Finder/Guide Scope to what the Telescope sees – do the cross hairs on the finder point to the exact spot the telescope is pointing to? It helps me with the alignment procedures for later.
- Polar Align The Mount = This part is actually easier at night once Polaris is visible in the sky, as my mount has a special “Polar Scope” that helps me get the mount as aligned with the North Celestial Pole as possible.
Aligning the Computer Telescope Software And Focusing
To ensure pointing accuracy will be as perfect as possible, I do what is called a 3-star align, where I essentially tell the computer where 3 certain stars are in the sky and then the software performs a triangulation and determines where everything is. After I perform the 3-star alignment, the software tells me how aligned with the NCP I am. If I am off by a degree or two, it does affect how accurate the pointing is – instead of the object appearing at the center of the FOV, it appears to the side of the frame, almost cropped out.
If my alignment isn’t “good enough” (less than 5-7 arc minutes from the NCP), then I make further adjustments, and redo the 3-star align until the computer tells me I’m “good enough.” The reason why is because when I input what object I want on the hand controller, I expect the telescope to slew it to the precise point without me constantly having to switch between eyepieces and my camera to make sure it’s centered in the FOV. Plus, it’s easier work for my autoguider to detect any drifting and make corrections as needed.
How Long Do I Shoot? How Much Exposure Do I Need?
Without getting too technical, it depends on the object and what I’m trying to show – different objects have different needs. The easiest objects are the largest and brightest objects in the sky, and the level of difficulty and data needed goes up the smaller and/or dimmer the object is. The dimmer nebulae or galaxies that can still be detected by your scope’s aperture may require an hours worth to glimpse their structures.
When I first started out doing astrophotography, I was just happy I was seeing new details on objects I hadn’t seen before with just my eyes through a telescope, so I would aim for quick bright results. But after people at my work started noticing my images, my standards kept getting higher to the point where now I aim for quality over quantity.
There are major differences in the details that set the bar between passable, great, and stunning. and a lot of factors are at play due too weather and changing Seeing Conditions, if the camera is focused, plus how well the guiding is working.
| Poor | Passable | Great | Stunning |
| ● super grainy ● stars are ovals ● bad color contrast ● very little data ●No Guiding | ● noticeable noise ● some blurry stars ● decent color contrast ● a few minutes data ● little to no guiding | ● some noise evident ● mostly sharp stars ● good color contrast ● 10-30 minutes data ● good guiding | ● little to no noise ● all stars sharp ● excellent contrast ● 30-60+ min. data ●great guiding |

M33 – Triangulum Galaxy 2019 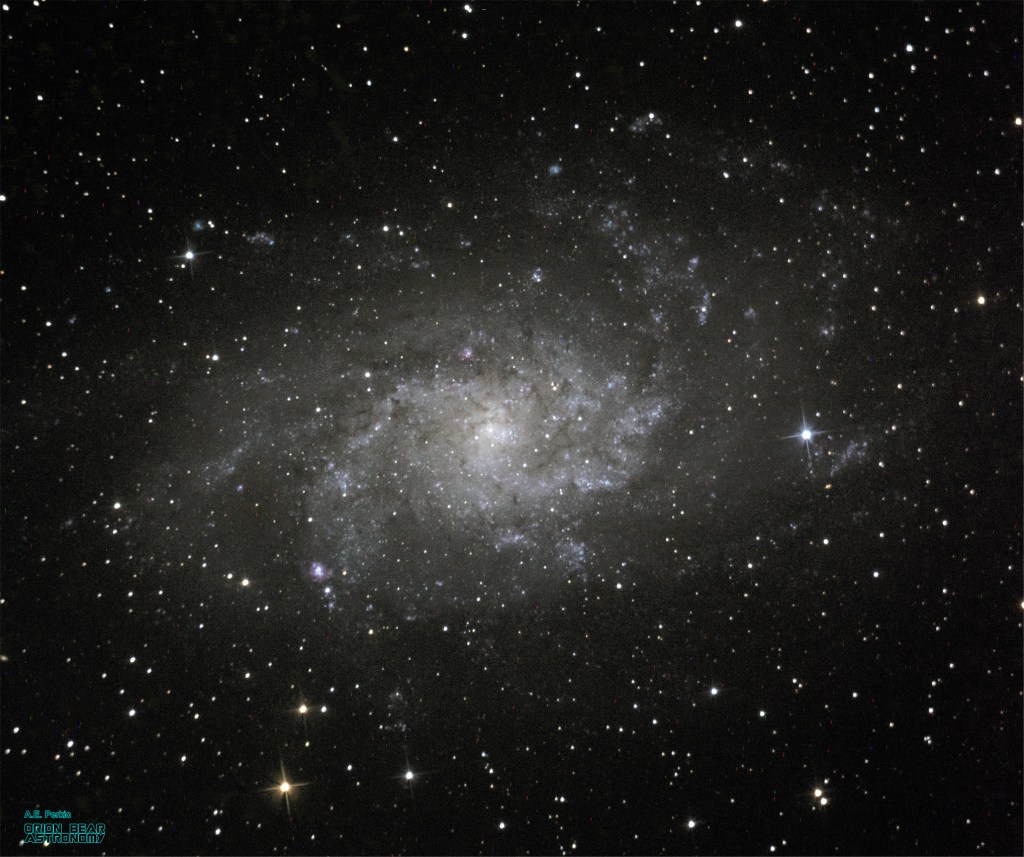
M33 – Triangulum Galaxy 2020

When it comes to ISO, I prefer not to go any higher than 400 unless I absolutely need to. Images shot with high ISO may require less exposure time, but their noise levels make super grainy raw exposures. As long as my guiding is working properly, I can comfortably shoot at 100-400 ISO and get 10-15 minute sub exposures easy. Raw images that are less noisy are easier to process as well!
What do I do While I Wait?

My laptop will be running PHD2, Stellarium, and an a clock app with a stopwatch. As long as the PHD2 guiding software is running without warning me of any problems, then I’m free to look up any other interesting objects on Stellarium, or Sky Safari on my phone. The computer version of Stellarium will help me see how I need to orient the camera frame, and where certain background stars need to be. So when I’m done exposing one object, I’m already planning and ready for the next.

It takes a lot of patience to wait for an exposure, especially when doing 10-15 minute sub-exposures. To pass the time, I have music playing on a speaker, so if I’m all alone and not in proximity to any other campers trying to sleep, I turn up my “Space Metal” playlist to 11! If I’m in a spot with decent cell service, then I may watch something on streaming services. Other times, I may go for a little walk if I’m 100% certain that no person or thing will come up and mess with the equipment. It’s quite a humbling experience when alone out in the middle of the California desert with nothing around you!

How long am I out?
Most of the night, or as long as my equipment holds out! During the Spring and Summer months, the most I get is as little as 6 valuable night hours to work with while Autumn/Winter months give as many as 10-11 – but my batteries may lose their charge quicker due to cooler outside temperatures. Basically, the night is over when either my equipment says it’s over, when I say it’s over, or when the Sun/Moonrise says it’s over!
I can count on one hand the number of times I’ve actually slept out there, even if just a little – most of the time I drive back and sleep in my own bed. You know you’re used to it when you consider a 105 minute one way drive to be a “short hop” versus the drives that can take up to 180 minutes (3 hours) or more – one way!
Photo Processing Is Your Best Friend
The saying “It looks fake” should always be taken as a compliment! While enough exposure time and light gathering can accumulate enough to get the details to to appear, the single raw shots are simply not enough if you want the images to look impressive and way less noisy in high definition!
I’ve learned this the hard way. When I was just seeking bright results, the images would look amazing in the tiny camera screen, but then when I went over them on my laptop, they would look “passable” but not what I would call impressive.

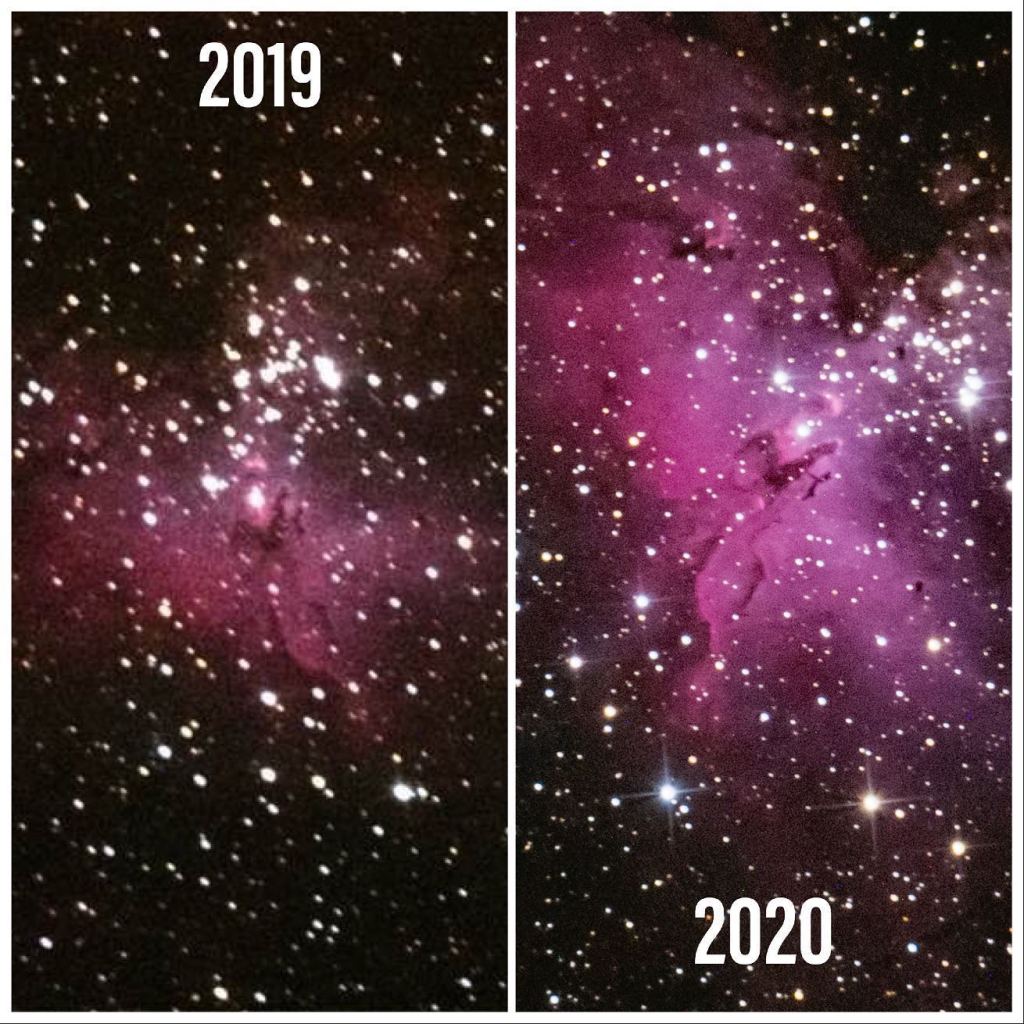
As my skills progressed, I’ve been on missions to outdo previously published versions, and that has meant spending more time shooting sub-exposures and combining them in processing. For example, with my 2019 and 2020 versions of the Horsehead Nebula; the 2019 version was shot at a higher ISO with no more than 15 minutes combined data to it, while the 2020 version was 8 sub-exposures ranging from 2-15 minutes at 200-400 ISO, and combined for 64 minutes.
The Horsehead Nebula 2019 
Horsehead Nebula 2020
On Photoshop I do things such as play around with the white balance, contrast, brightness, haze removing, noise reduction, sharpening, and do a lot of color correction between the sky and any details I’m wanting to show. When stacking the frames, using the opacity tool helps me align the background stars to each other. The more ISO I used in the raw image, the more noise I have to clean out each frame, which is not easy when the detail on a galaxy or nebula looks similar to the background noise.
Sometimes I try and do HDR techniques in the stacked images, such as an image of M42 that was shot at f/10 rather than f/5… having a less exposed frame that shows the Trapezium stars on top of a frame that overexposed the Trapezium stars, and blending that together.
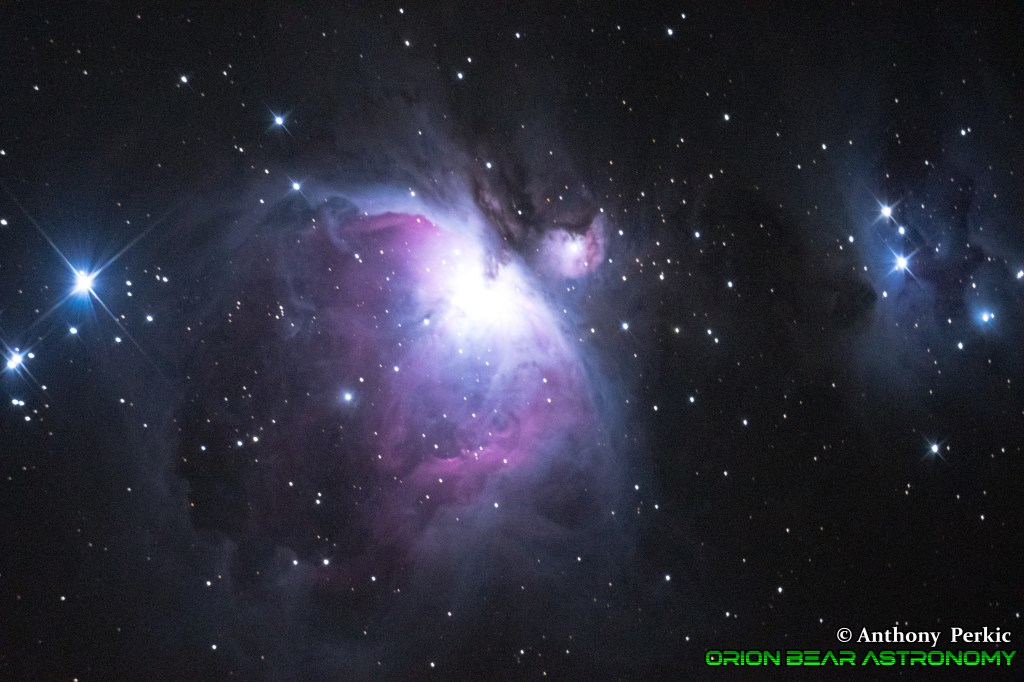
M42 – Orion Nebula over Joshua Tree National Park 
M42 – Orion Nebula 
The Sword of Orion featuring M42 – Orion Nebula 
M42 – Orion Nebula shot at f/10 rather than f/5
In this case, it pays to be skilled at Photoshop! While it’s great to be able to showcase what the object would look like if your eyes could accumulate more light, the best pictures are those that make people take a second look.
While I personally like to process each image in the stack individually, I am not against any method of mass stacking through specialized software, especially when hundreds to thousands of frames are involved, which I will do so when shooting planets and use movie frames as separate images.
