

Originally, when I bought my 8″ Newtonian Telescope in 2017 equipped with a SkyView Pro EQ mount and Dual Axis Clock Drive, astrophotography was NOT in the picture… pun intended.
In this article, I show you the progress that was made towards turning a visual telescope setup into an astrophotography telescope setup.
2017 | SkyView Pro w/Clock Drive
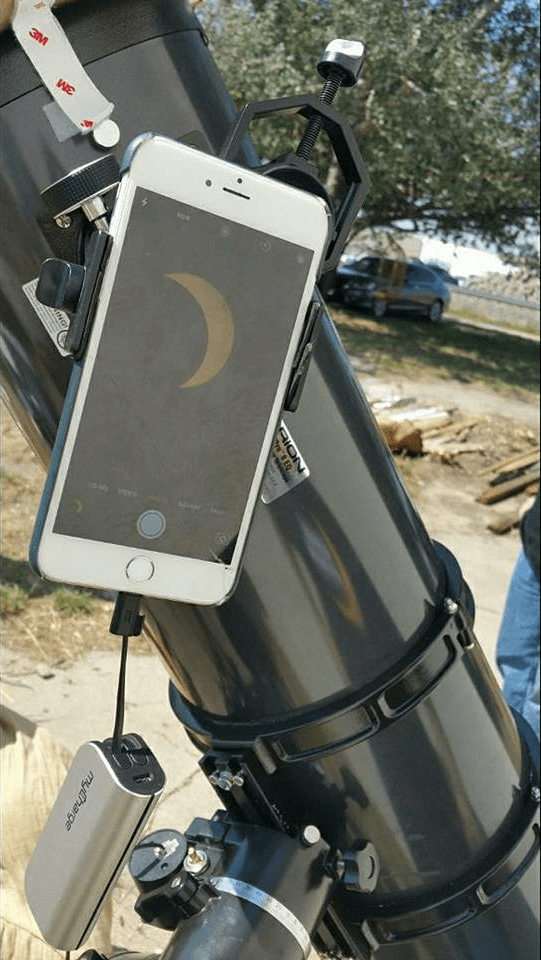
Visual Telescope w/ iPhone adapter
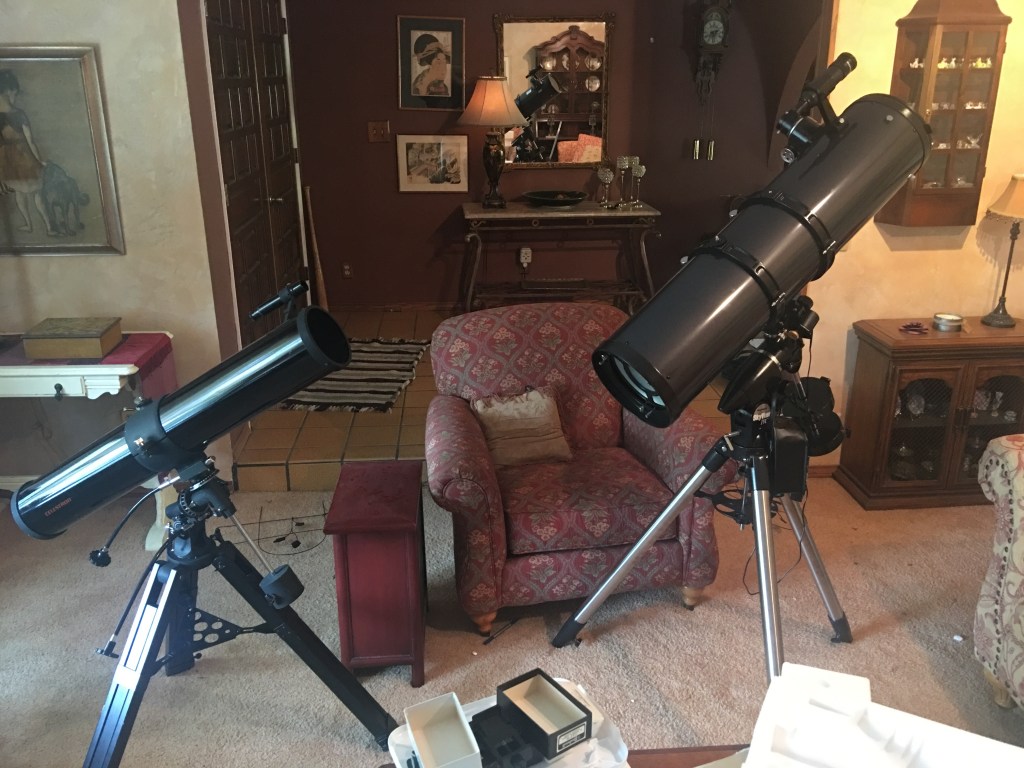
The 8″ Newtonian on the SkyView was originally meant to just be an upgrade to my 20 year old Celestron 4.5″ Newtonian. But the seeds were already planted when I had bought an eyepiece adapter for my iPhone, and live streamed the moon on Facebook directly from it.
With an iPhone 6, people enjoyed my occasional live stream presentations, and the 2017 Solar Eclipse was taken with this exact setup. So to answer the question of “can you do astrophotography with a smartphone?” the answer is yes, if the object itself is bright enough for the camera sensors and you’re just doing basic snaps or videos. Long exposure? Not so fast…
Taken by Alaska Thomson, who gave me permission to use this image. 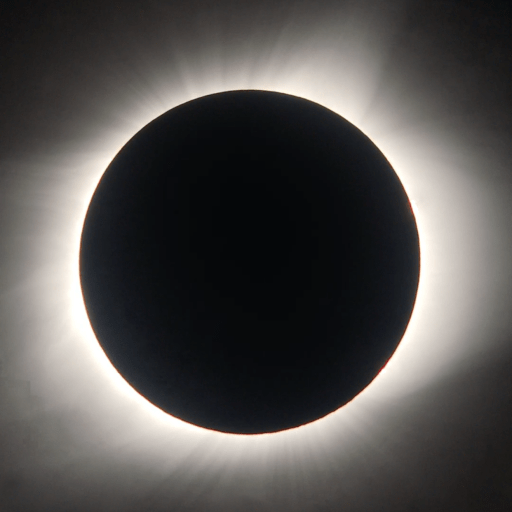
Great American Eclipse 2017
But for most of 2017 into 2018, my telescope was mainly visual. I had purchased eyepiece kits and Barlow lenses to provide different views than the default eyepieces the telescope came with. While I’d occasionally do some solar system shots with an iPhone in reactions to what I was seeing with my eyes, that was the extent of my astrophotography. But even I knew that there was only so many things I could see visually, and having already seen the best of what the deep sky has to offer visually under a dark sky, I knew that eventually I would want to give it a try.
December 2018 | A DSLR Gets Added
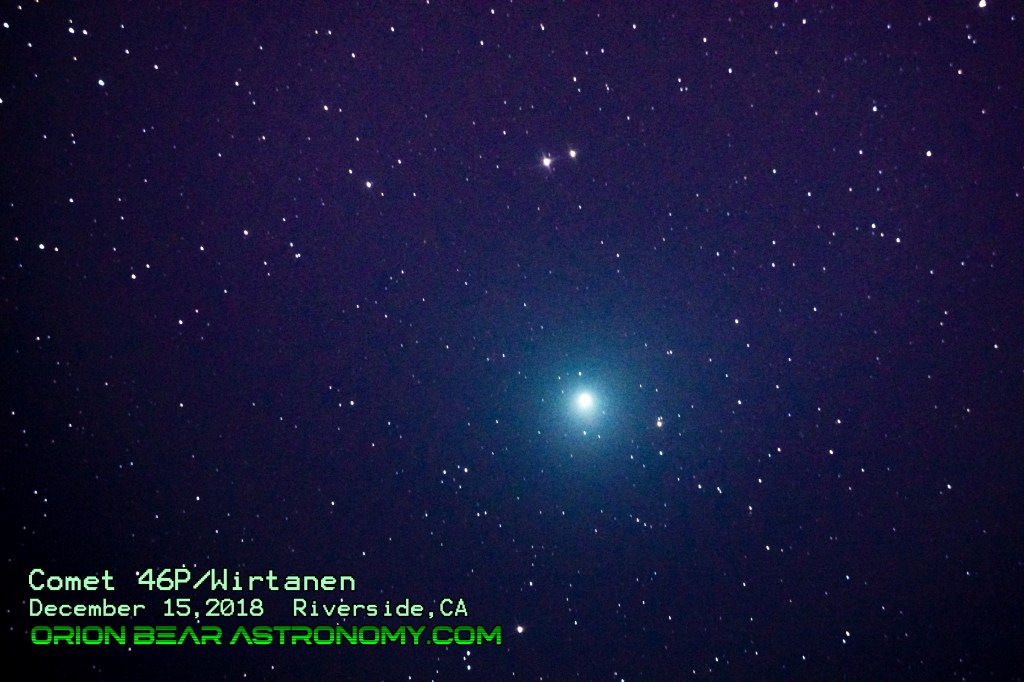
Just like comets before that inspired me to get a telescope and into astronomy, another comet inspired me to give long exposure photography a try. 46/P Wirtanen was proving to be a bright enough target from suburban skies, but the only true way to really see it was through long exposure.
The telescope setup actually came with a Prime Focus T-ring adapter for DSLRs, just in case the buyer wanted to try astrophotography. It threaded onto the Crayford focuser itself, but it was a hassle because I would have to screw off the eyepiece port and screw on this adapter each time I wanted to adapt a camera onto the telescope. And believe me, it wasn’t easy considering I needed to visually see if I had the object centered.
Initially, my father had an old Nikon D70 that was on its way to being discarded – hence why I bought the T-rings that specifically worked with Nikon cameras. It was so old that it did not have a “Live View” function despite having a preview screen. But unfortunately, the amount of time I got to use it to learn the ropes was cut short when the camera itself broke down and became a brick – hence my purchase of a Nikon d5300.
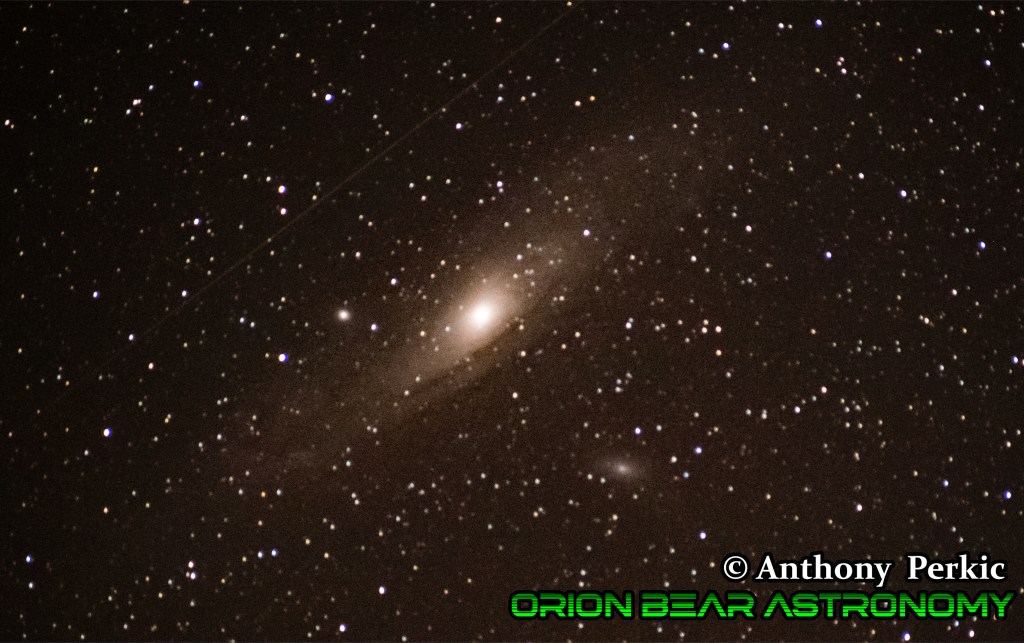
M31 – Andromeda Galaxy 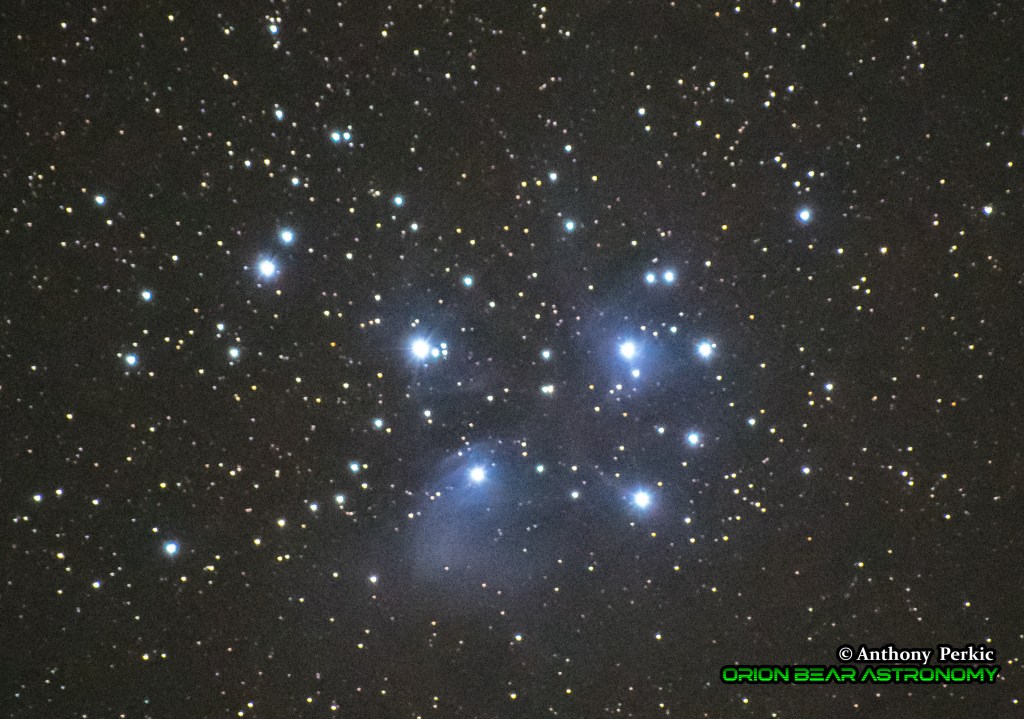
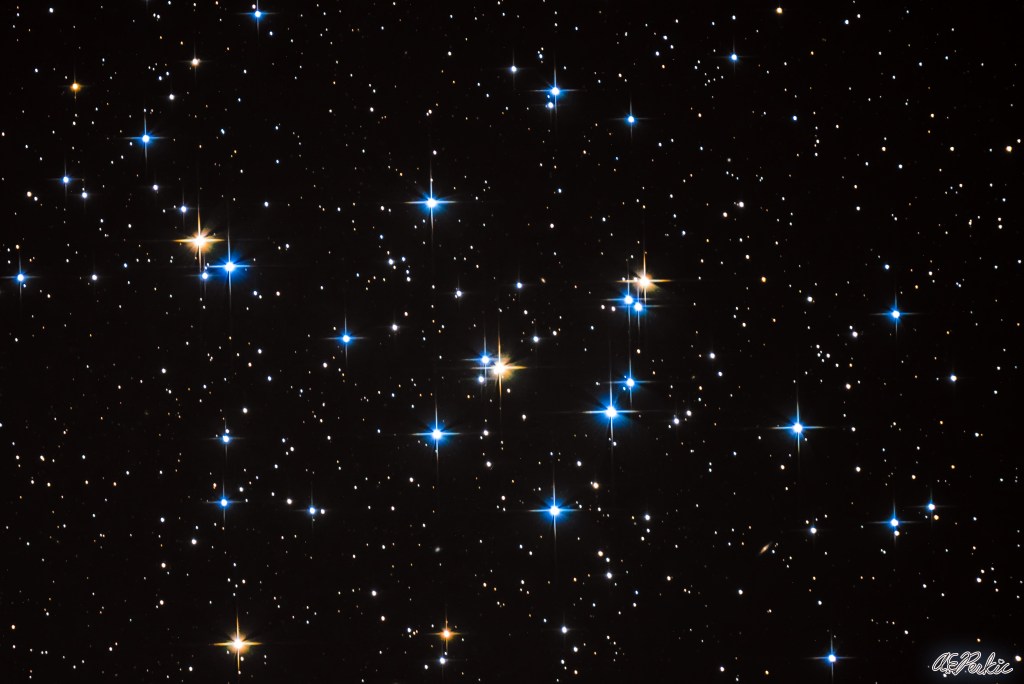
M45 – Pleiades 
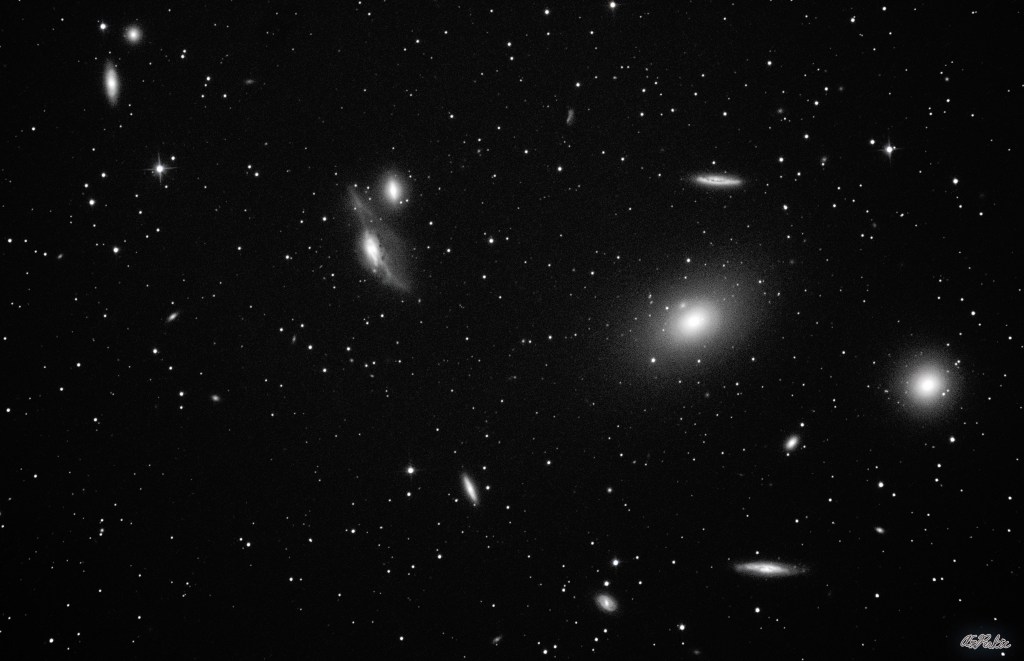
M81 & M82 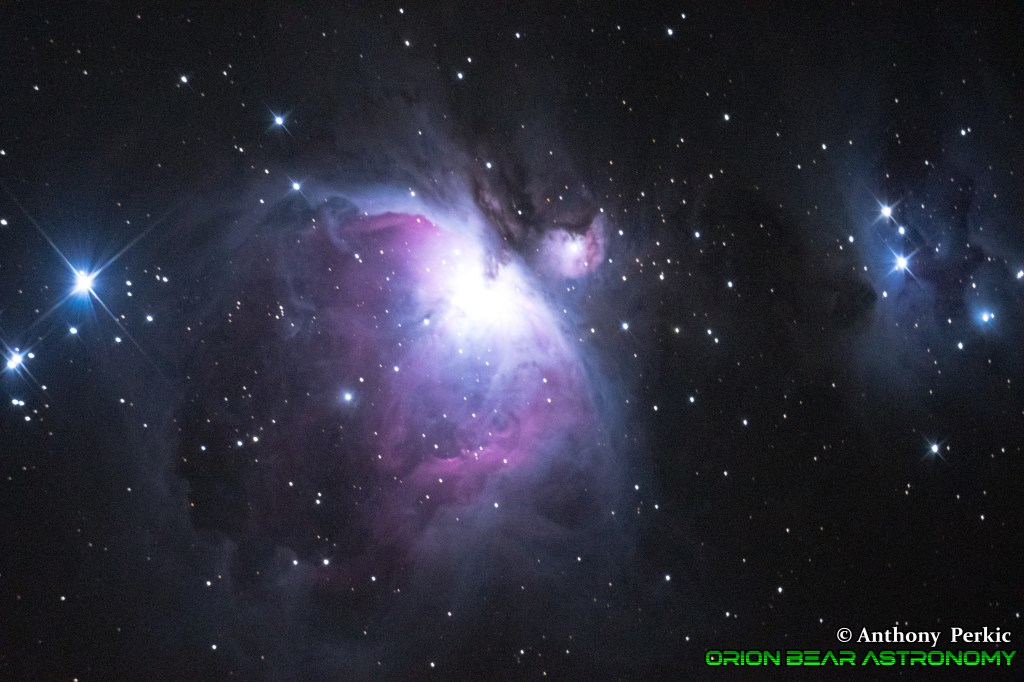
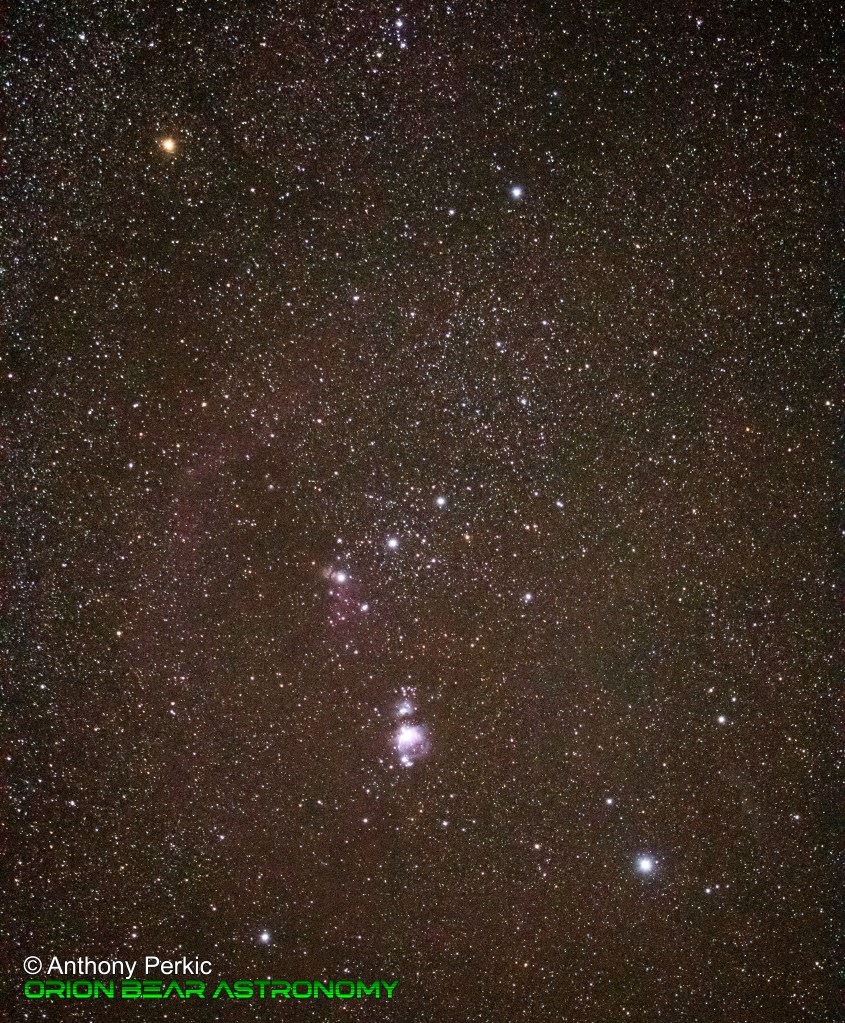
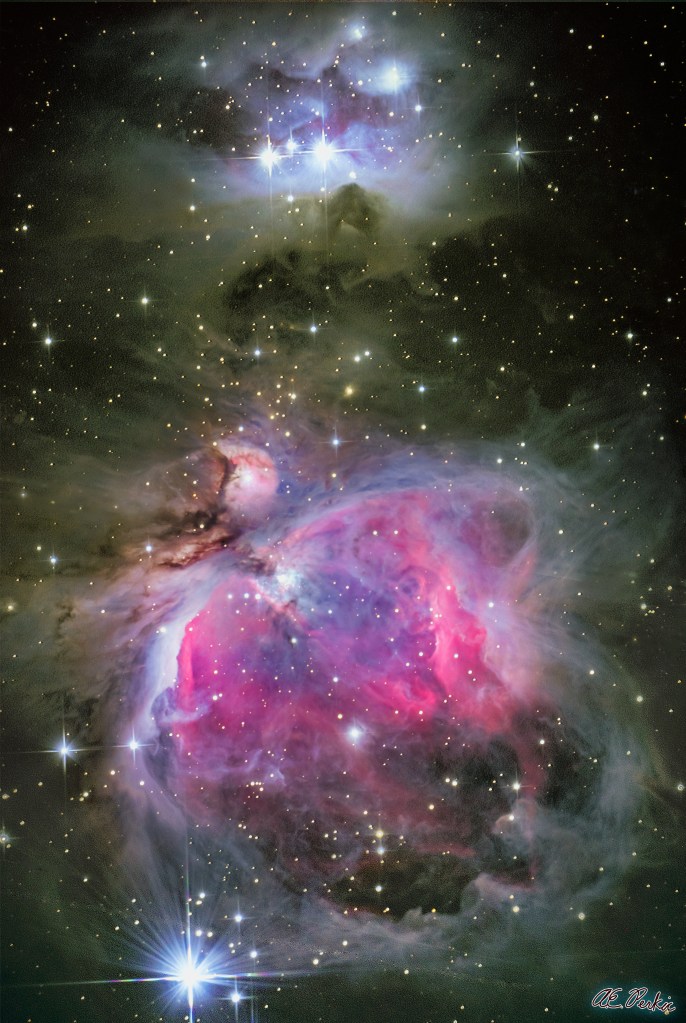
M42 – Orion Nebula over Joshua Tree National Park
My first attempt at long exposure of the deep sky came in February 2019, during a bitterly cold night out in my usual spot at Cottonwood. I could safely say that when I shot the Orion Nebula, that frost built up on my telescope tube!
It was on this night where I learned how important polar alignment was, as the most I could usually get was 30 second exposures, maybe up to a minute if I was lucky. With bright objects like the Orion Nebula, the stars were bright enough in live view to focus, but when it came to the M81/82 pair, it was much tougher considering the focal points with eyepieces and the focal point with the camera were in different spots, and I had to do many trial and error shots before I could see the stars in focus. Also, don’t forget how much I had to switch between visual mode and imaging mode, and all the times I had to thread on and thread off the adapters for each!
I also tried wide angle shots with the camera lenses while tracking on the mount, and was very pleased with my newfound capabilities.
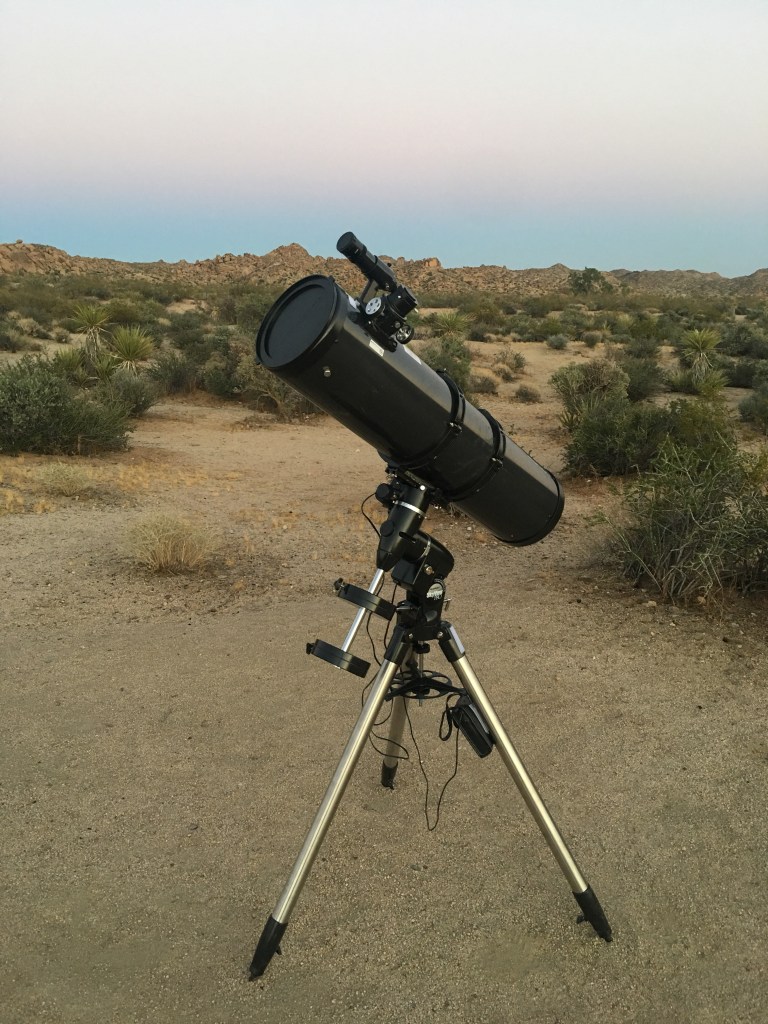
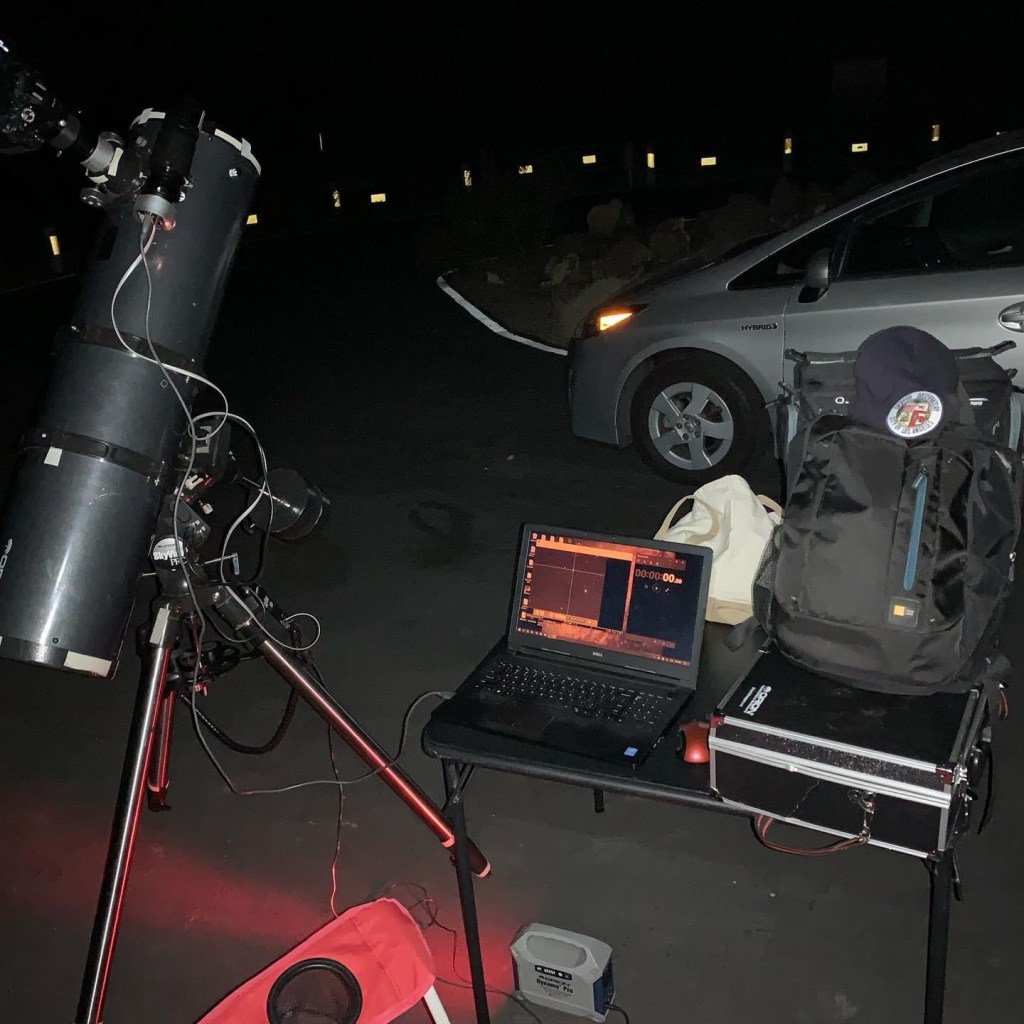
February 21, 2021 | Swapping the Clock Drive for a GoTo Drive
SkyView Pro EQ w/ GoTo Drive
Even though as a Telescope Demonstrator at Griffith Observatory I was using a CPC 11 on the front lawn for public viewing; I was originally hesitant to buy a GoTo Drive.
I was and still am an old-school proponent – in that just because one purchases a GoTo telescope doesn’t mean the owner is proficient in knowing where things are in the sky; and as a visual observer, I still enjoyed using the coordinates to find objects and having those skills to fall back on.
But after that night where I used a clock drive, I realized that needing a GoTo was inevitable, because it was the only way I could achieve images with properly guided stars to account for being slightly off in Polar alignment.
For most of 2019, I used this setup without the autoguider for money reasons. The Goto Drive itself was about $500, plus the battery pack needed to power the drive was another $150, and I just didn’t have the extra $400 needed for the autoguider package.
But each time I went out to the California deserts were nights I gained experience. One MAJOR plus with the GoTo Drive and the trick I learned with using a DSLR’s Live View was simply setting the focus on a bright star during the 3-star alignment procedures, and then never having to worry about adjusting it again, as once the 3-star alignments were performed, I could simply push a button and go to the object, and it would already be in frame – less time searching, more time exposing!

M16 – Eagle Nebula 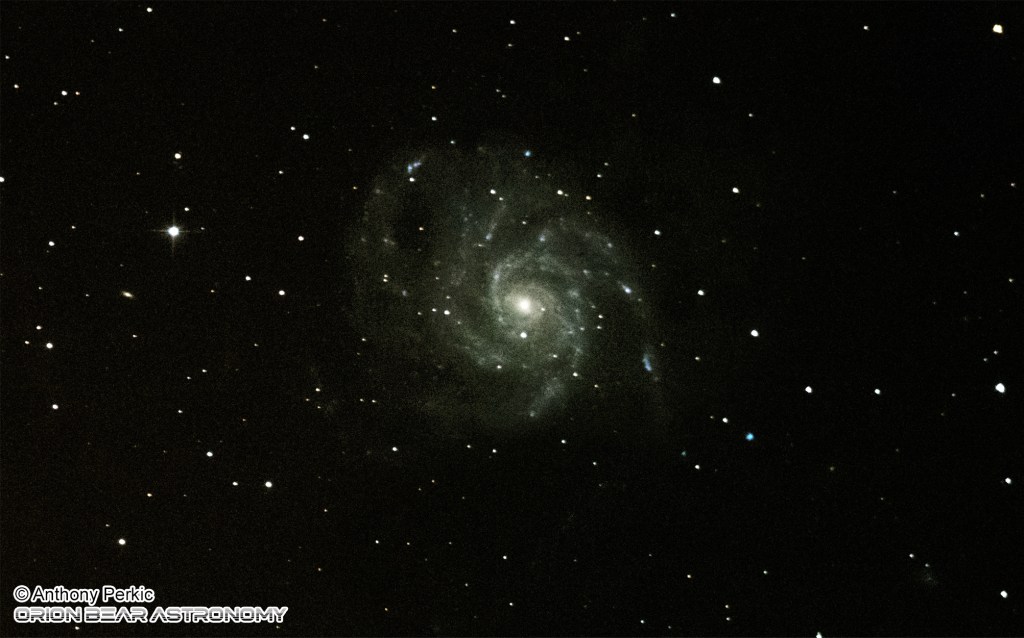
M101 – Pinwheel Galaxy 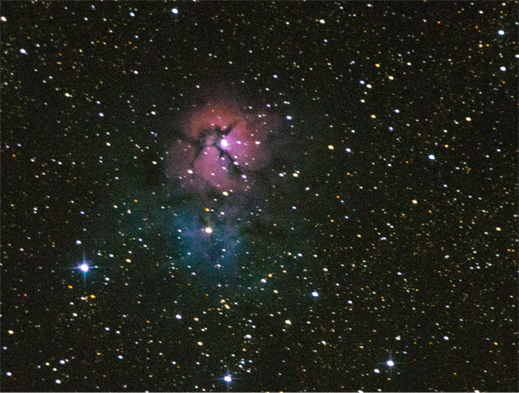
M20 – Trifid Nebula
November 2019 | the Auto Guider Gets Added
The original 40mm Finderscope gets swapped for a 50mm Guide Scope
With the Autoguider added, more pieces of the puzzle were getting fitted! I was then able to achieve 5-10 minute shots of the deep sky… sometimes…
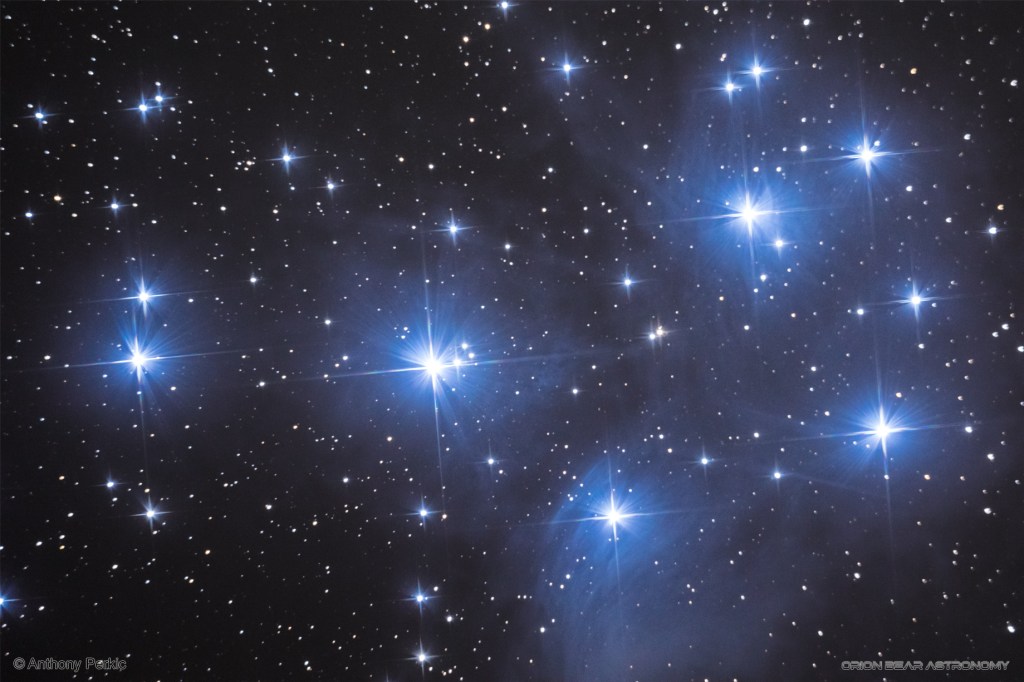
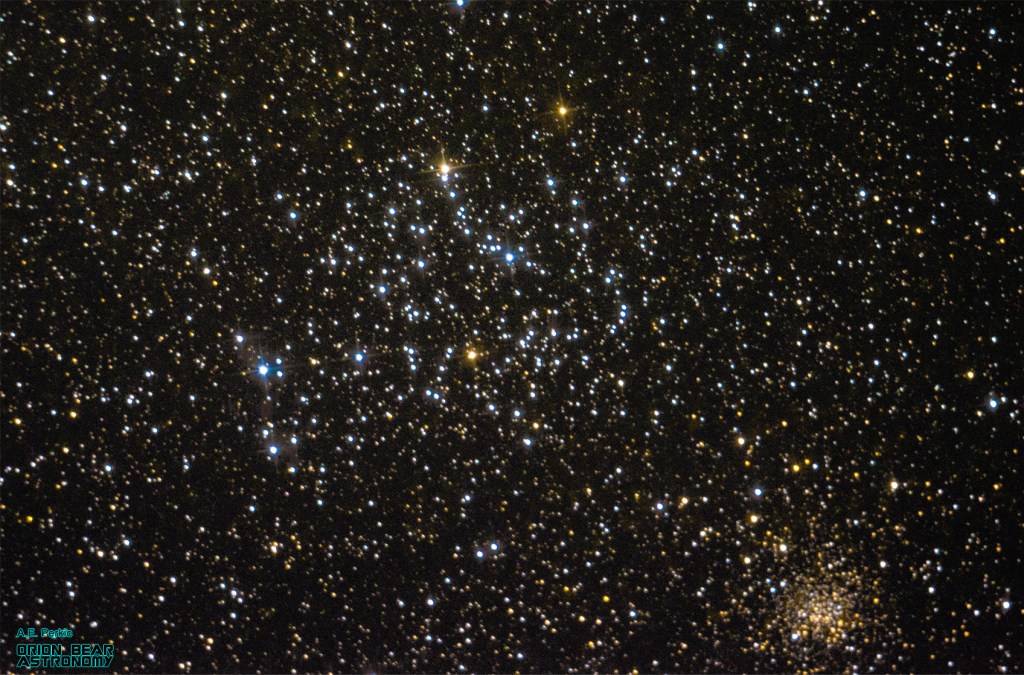
M45 – The Pleiades 12/19/2019 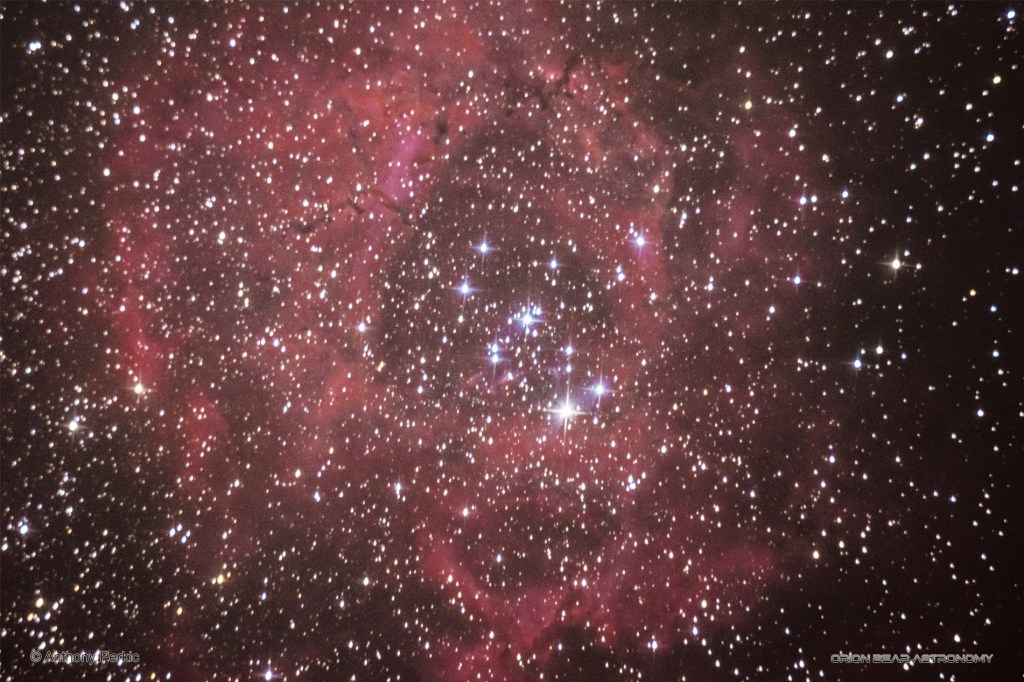
NGC 2244 – Rosette Nebula 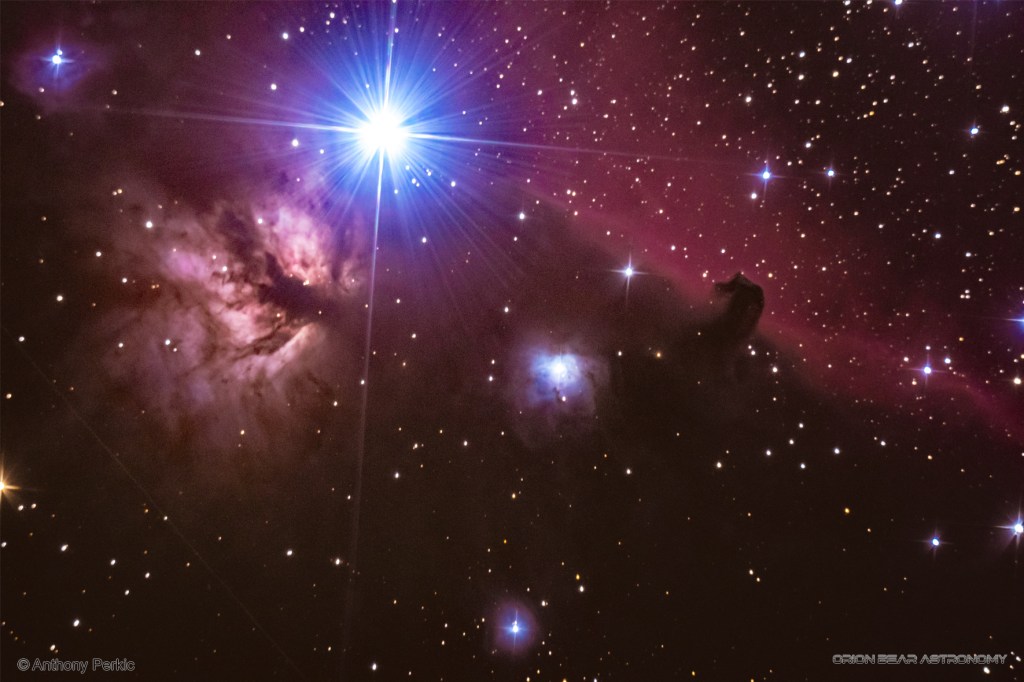
The Horsehead Nebula
When I mean SOME of the time, it’s because while it seemed like the stars aligned on the night I snapped a successful 10 minute exposure of the Horsehead Nebula in late 2019, the next few nights after that saw many exposures only able to go about 2-3 minutes before backlash problems would cause the stars to look like morse code.
While it did get me to learn to take sub-exposures instead of just pushing for super long exposures and simply layering them in processing for noise reduction and increased sharpness, I learned the hard way how important weight load was to the mount itself.
The Skyview Mount was only capable of holding 20lbs – and the Optical Tube Assembly which included the tube rings, telescope tube itself, the camera, the guide scope, and autoguider camera amounted to about 22 lbs… two pounds OVER the max load. While it’s great for visual use, for imaging, I was trying to make the mount perform beyond its capabilities, and unless I could get everything balanced to the millimeter, nights where I could get longer sub exposures were going to be extremely rare.
On most nights, because the mount couldn’t always handle the max load, the guiding itself was impaired, and the PHD2 software would sometimes take 15 minutes to calibrate only for it to tell me it couldn’t make adequate corrections due to the gear backlash.
So eventually, I knew I would need to save up the money and swap the SkyView Mount for a much more beefy and sturdier mount that could handle the OTA weight load.
But for the first half of 2020, I persevered on and did what I could with what I had. All of these are shots done with impaired guiding, and the sub exposures were usually no longer than 3 minutes.

M20 – Trifid Nebula 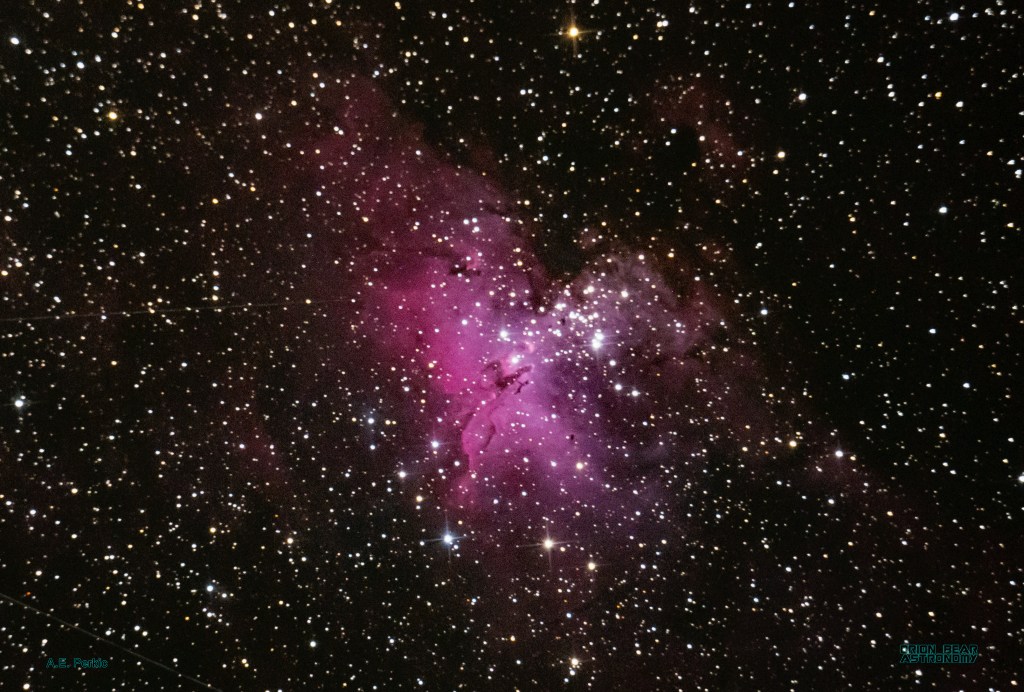
M16 – Eagle Nebula 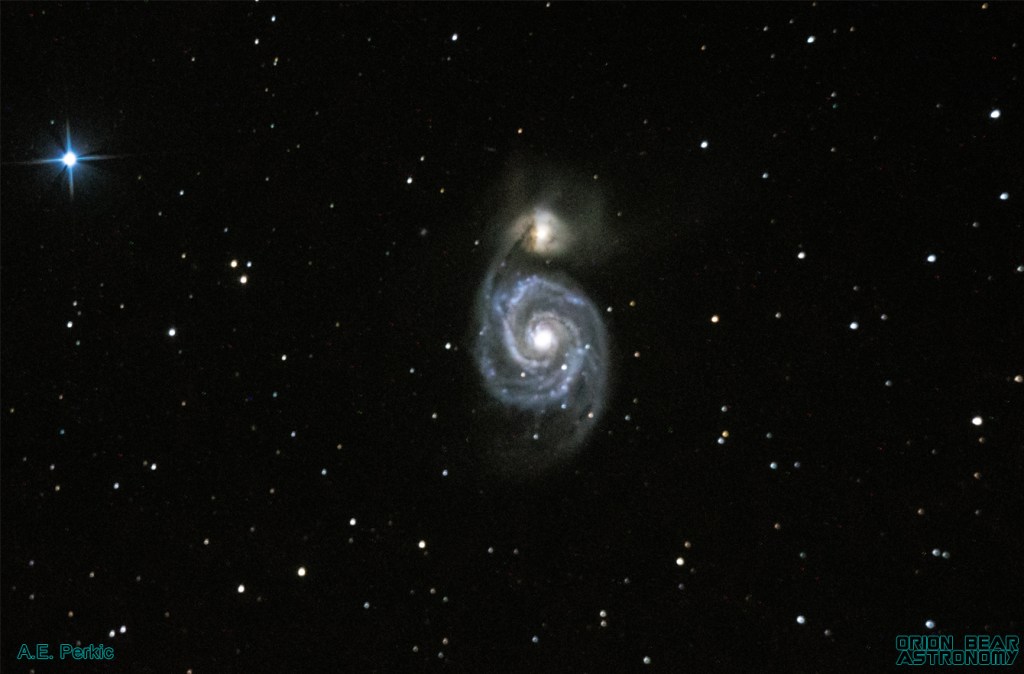
M51 – Whirlpool Galaxy
Summer 2020 – The Atlas II Mount Arrives
The Optical Tube Assembly remains the same while the SkyView gets swapped for the Atlas II
Starting in the spring of 2020, the senior staff at Griffith Observatory began opening up astrophotography opportunities among those who were doing it. My boss at the time, who already liked my progress with it, had recommended me to the Curator at the time (both have since retired). The Spring and Summer months had seen three comets, including Comet NEOWISE make headlines, and while the Observatory wasn’t open to the public during the Covid-19 Pandemic, they could still use my photos for presentations and outreach purposes online.
So now that Griffith was depending on me, my own personal standards went way up, and I knew that I needed to get that mount that helped make my images better. That mount was the Orion Atlas II, with it having a max load of 44lbs, it could easily handle the 22lb OTA for imaging.

Unfortunately, due to the mount being backordered, I had to wait almost TWO months before it arrived in late August 2020. But on my first night out with it in the desert, I noticed instantly I had made the right choice when the Autoguider software had no issues calibrating and making corrections! The tracking was smooth with little backlash problems.
With this mount, I was able to easily get the 5-10 minute sub exposures if I really felt I needed them, but now I was also layering and stacking – thus the results spoke for themselves!


The Sword of Orion featuring M42 – Orion Nebula
Late 2020 – Added a Coma Corrector plus Swapped the Original Focuser with a Low Profile Dual Speed Focuser
Always wanting to improve my images, I had noticed that in a lot of them, even with the improved mount and guiding, that the edges still looked out of focus while the center of the image was fine. That of course was due to coma, an effect caused by the concave primary mirrors, which is quite common with “fast” f/3 – f/6 telescopes. (Notice the “Sword of Orion” picture above, and look at the stars near the bottom… you can see they’re a little “off”). While I could always crop out those edges, it wasn’t always ideal for objects that took up the entire frame!
Thus I ordered a Baader MPCC Mark III Multi-Purpose Coma Corrector.
However, it could not adapt into the default prime focus adapter that came with the Newtonian telescope. While it could adapt into the 2″ eyepiece port, the port itself was too high, and thus the camera would not get focused enough.
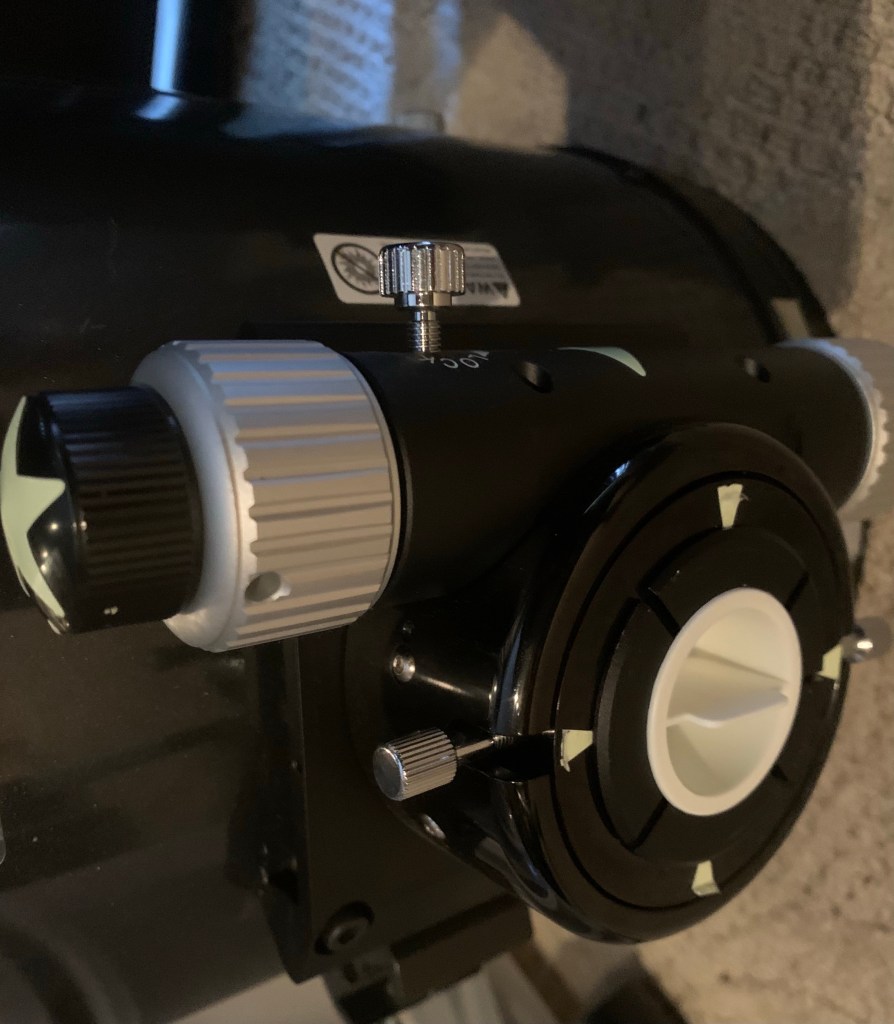
So therefore I purchased an Orion 2″ Low-Profile Dual-Speed Hybrid Reflector Focuser. This had the proper eyepiece port that could get low enough for my camera to be at the proper focal point.
The added plus with this addition was the dual speed focuser that included a slow fine adjustment knob, and it also had an extension tube for just in case I needed the focal point to be higher, such as whenever using a Barlow lens or imaging planets with an eyepiece projection adapter.
This of course helped do the trick when it came to imaging with the default f/4.9 mode.

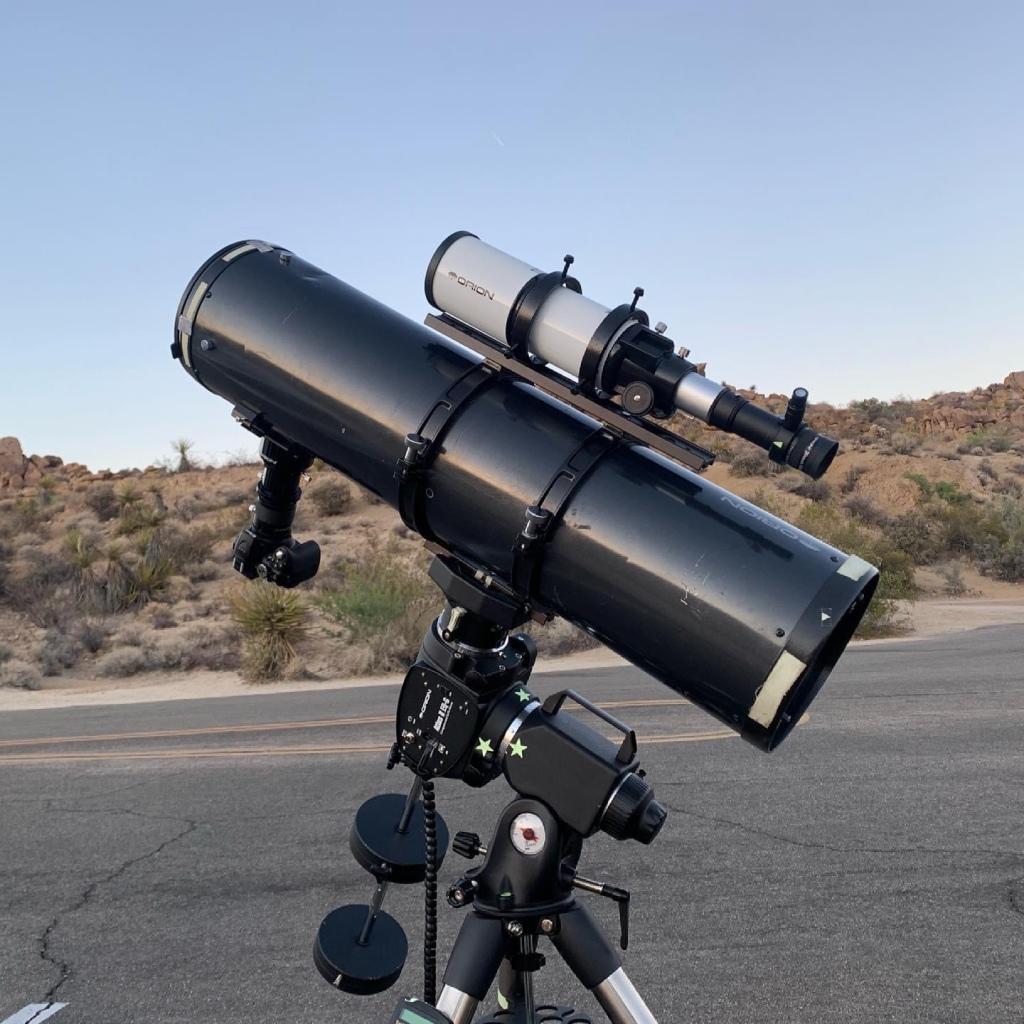
May 2021 – Added the 80mm Short Tube Refractor as a Guide Scope
As I was running out of objects to shoot at f/4.9 (1000 mm focal length), the time would come when I knew that I’d want to shoot at f/10 with a Barlow Lens.
While the mount I had would definitely be capable, the other issue was with the guiding, as a 50mm guide scope was not enough aperture nor sensitive enough for guiding a telescope that was shooting at 2000 mm focal length…
The 80mm Short Tube Refactor was installed to piggyback on top of the Newtonian, and it also has a port where I could still add a smaller finder scope.
One minor inconvenience is that in order to be properly balanced, the eyepiece port/camera has to be installed upside down while the telescope is in zero position… awkward yes, but necessary.
Shortly after this, I also began using the PHD2 software as a “virtual finder scope” as bright enough stars could still be seen with the camera looping at less than .2 seconds of exposure, which made it much easier to perform alignments without constantly racing between looking at what the DSLR was seeing versus the finder scope.
While it definitely helps, I still have a ways to go before I feel like I can pull off amazing f/10 shots of distant galaxies. Still, the increased sensitivity and aperture helps the guiding for f/5 images a lot.

M57 – Ring Nebula 
M27 – Dumbbell Nebula 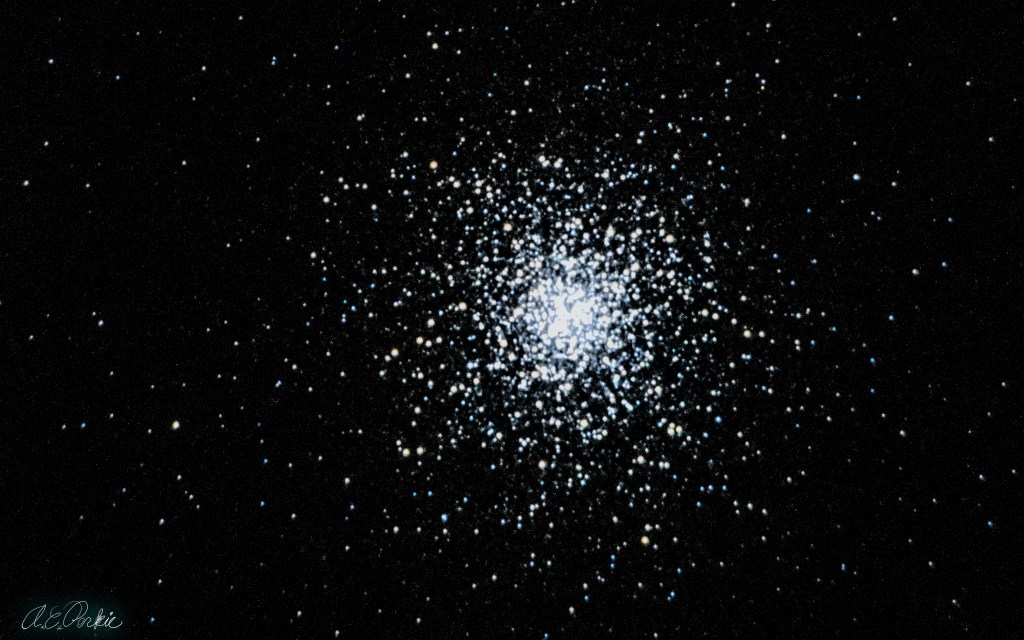
M13
So just in case you lost track…
- The originally purchased clock drive was swapped with a GoTo Upgrade for the SkyView
- The original Finder Scope was swapped with a slightly wider Guide Scope for autoguiding
- The SkyView mount that came with the telescope was swapped with the Atlas II Mount
- The original Crayford Style Focuser was replaced with a Low Profile Hybrid Focuser
- Added a Piggyback 80mm Short Tube on top of the 8″ Newtonian
