

Those colorful images of nebulae and galaxies can all be achieved with prime focus photography! But out of all the types, it is the technique that requires the most practice, skill, and above everything else, the right equipment! If you dedicate yourself, you too can learn how to take pictures as good as anyone’s!
The Camera
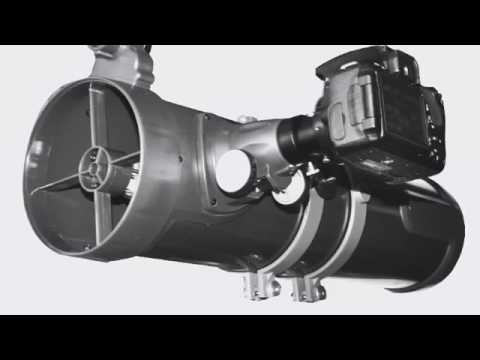
With prime focus photography, you’re not looking through any eyepieces and you’re not using any camera lenses. The camera is adapted into the telescope itself, is focused using the telescope’s focus wheel, and the light travels directly into the camera sensors, essentially making the camera itself the eyepiece!
The focal length and focal ratio of the telescope factor in how wide or narrow the image is, plus how fast the light enters the camera. For example, a 1000 mm focal length telescope with an F-Stop of f/4.9 means your telescope is now the equivalent of 1000 mm f/4.9 focal lens! Oh, and now it has way more light gathering power!
Sorry, You’ll Have to Ditch the Smartphone and Get An Actual Camera!
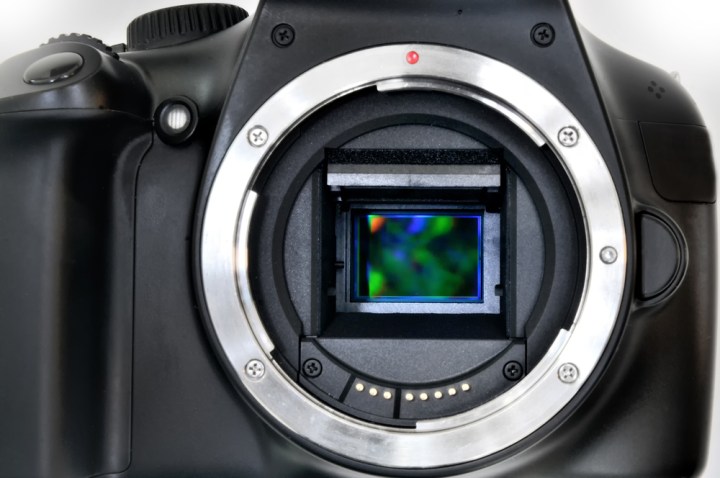
Prime focus astrophotography just isn’t possible with a smartphone. You need either a Charge Coupled Device (CCD) or Digital Single Lens Reflect (DSLR) camera to be able to get these shots.
Professional astronomers in the digital age use Charge Coupled Device Cameras (CCD) which are much more light sensitive than film. While DSLR’s are more readily available, can get the job done, and are easier for beginners, they may get more noise and require longer exposures than a CCD.
There are some pros and cons with each type of camera, but at this point it’s not about you getting the best equipment possible, it’s you learning the ropes with what you get! With any camera, having a live view screen is very useful, as bright stars will show up and help you determine if the image is focused or not. .
Oh, and try to stick with one brand for DSLR cameras – their respective adapters are interchangeable between the cameras for that brand.
Get a Remote Shutter
This should be common sense. Most cameras are designed to have automatic shutter speeds no longer than 30 seconds. Any longer than that requires the BULB setting, and thus the shutter stays open while you hold the button. The major problem with that is you’re shaking the telescope, and ruining the exposure!
But with a remote shutter, that ruins the hassle! Just set the camera up to work with it, and make sure it doesn’t automatically turn that function off after a few minutes.


The Telescope
The Mount – MUST BE EQUATORIAL WITH A MOTOR DRIVE!
The type of mount is the most important. As stated in this prior article, anyone who wishes to one day try long exposure astrophotography through a telescope needs an equatorial mount! These mounts are especially designed with Earth’s rotation in mind, and even manually are the best fine adjustment trackers.
MINIMALLY – The equatorial mount must at least have an RA clock drive so you can automatically compensate with Earth’s rotation. Good telescopes with an equatorial mount equipped with a clock drive usually start in the $500 range. In other cases, the actual drive must be bought separately.
Equatorial mounts by default will enable you to take longer exposures, and the more accurate you are, the longer you can take before periodic errors in the gears and alignment will require special guiding to achieve even longer exposures while keeping the background stars sharp and circular.
Can’t I do long exposure with an Alt-Az Mount if it’s computerized? Yes and no. You CAN expose, but field rotation due to the mount not being aligned with the celestial poles will only allow you to expose for 15-20 seconds before the stars trail. The only way around this problem is to take hundreds of 15-20 second sub exposures and stack them later in processing.
Telescope – Start With Something More Portable
As long as your MOUNT has the minimal requirements as mentioned in the previous section, you can attempt astrophotography with any telescope equipped with it!
A lot of astrophotographers recommend starting out with a smaller wide field refractor telescope due to their ability to take crisp sharp images, having a wider field of view, and overall portability. It’s much easier and takes less equipment for longer exposure images with a shorter focal length.
I myself began astrophotography with a larger 8″ 1000 mm focal length reflector by circumstance, as I got it for visual use, and then gradually got all the necessary equipment to fully utilize the scope’s imaging capabilities. It was a steeper curve for me.
Get The Proper Adapters!
Each type of astrophotography is a different set up, and prime focus is no different.
What you essentially need is an adapter that makes your camera the eyepiece. Each type of telescope has a different configuration and requires a different adapter, so make sure you understand the type, and know what your telescope can accept.
In the case of my 8″ Newtonian, mine came with a threaded ring that screws into my 2″ eyepiece port, and all I needed was a T-ring adapter with the right width that screws onto the adapter while also being inserted into the camera bayonet port. I also have a different adapter that goes into a 2″ Barlow lens, so if I wanted to try a longer focal length I can.
Computerized GoTo Drives are Highly Recommended!
Minimally, an equatorial mount with a clock drive is all you need to get started. You don’t necessarily NEED a GoTo drive, but from experience they are super handy to have!
I myself swore off computerized telescopes for the longest time, because I can agree that they take the fun out of finding objects and using actual coordinates. But they are especially useful for astrophotography – once you get the alignments and focus correct, you spend less time searching and more time shooting.
You can read this article to go over if you should make the big decision, as once you get one, there’s no going back!
Want Super Long Exposures? Get an Autoguider!
Even if you managed to get your polar alignment to be perfect. Even if you can get a computerized telescope working properly and find objects with ease, the longest you’ll be able to expose for prime focus will be a few minutes if that! The stars will still appear to drift or trail off a tad, usually by periodic errors in the motor gears and polar alignment error. Then all your background stars will look like Morse Code.
An autoguider picks a “guide star,” notes the periodic drift errors, and then tells the mount what to do in order to correct it.

While it’s not required per say, eventually you will want to take longer exposures but keep the stars perfectly sharp and round, not as ovals or dashes. Depending on your setup, you can get one that’s used in a guide scope, or an off axis guider. Just make sure the software and drivers are compatible with your laptop!
TL;DR – Minimum: get an equatorial mounted telescope with a clock drive. Maximum – same telescope as minimum but add a computer drive and autoguider. No matter what, get an actual camera and get the proper adapters specific to your telescope setup!
The main reason why I upgraded my clock drive on the SkyView EQ to a computerized GoTo drive was because the GoTo drive is compatible with an autoguider. Let’s put it this way, I would not be able to achieve 10 minute exposures featuring zero star trails without it!
Support Your Neighborhood Astronomers!
You know where mainstream media sites get their information? From people like us! Support Your Neighborhood Astronomers! Everything is free, but donations help keep the website alive and go towards outreach events!
$1.00

One thought on “The Things You Need for Prime Focus Astrophotography!”